WONDERLENS:
Behind the Scenes
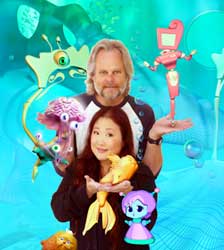
(image courtesy of the Orange County Register)
Two animators, nine computers, 79,000 frames of animation (but who’s counting?) and a year with no sleep!
The Idea
That’s us – Joe & Susan, the whole big, bad crew behind Wonderlens.
Well, that’s not entirely true. We also have “the Minions” – our hardworking team of computers,
(basic PCs), which we use for animating, rendering, editing, authoring, creating music, blogging and building the www.WONDERLENS.com website.
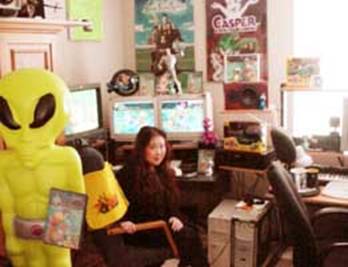
Here’s me with some of The Minions. Note dual monitor setup…LOVE IT!
Wonderlens is all computer animation. But that doesn’t mean the computers do ALL the work!
Ah, if only it was that simple. But, no. animating is still a job for us Earthlings.
Here’s how it works.
Like everything, it starts with AN IDEA. We got the idea for WONDERLENS back in 1999. We’d just come off a long run of TV & Film projects and to unwind, we got annual passes to Disneyland and started hanging out there…a LOT.
We LOVE Disneyland. If you’re lucky enough to live close, you can zip over to Tommorwland for lunch or Adventureland for a quick ride and feel like you’ve been on a cool little vacation.
Until summer hits, that is. Then the park becomes a molten sea of cranky humanity and the very opposite of all things “quick” or “cool”. And it’s not just Disneyland that reaches critical mass. The zoo, the aquarium, the parks and the beaches all become a bit more effort and a lot less fun.
So wouldn’t it be excellent, we thought, if there was a way for ANY ONE, ANYWHERE to go on a cool little vacation ANYTIME? Not a big old cruise or a month in Europe, just an hour or two of fun, whenever you feel the need to get away.
Well, that’s the idea behind the Wonderlens.
Pop in the DVD and you’re on an outer space vacation.
Gotta get to work or fix dinner? No problem.
Your vacation oasis will be waiting, right where you left off.
The next step in creating WONDERLENS was figuring out where this cool little animated vacation getaway should be. We decided on the Aquarium of the Aliens.
Part Amusement Planet, part Aquarium, it’s fun, exotic and a place you’re not likely to find via your regular travel agent. We wrote about it. We sketched it. We imagined what kind of alien tourist you’d meet there.
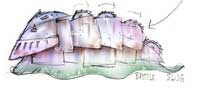
Here’s an early sketch of a BATTLE SLUG, just one of the 24 aliens you’ll meet during your vacation.
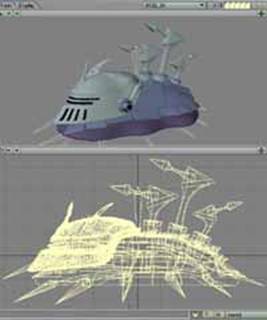
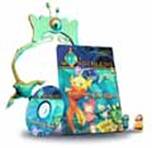
Here’s the Battle Slug after we’ve built him as a 3D computer model.
The software we use to model & animate is called LightWave 3D.
We build our computer models “from scratch” – meaning we sculpt them within the computer, point by point instead of sculpting them out of clay first and then scanning that into the computer. I like to work directly on the computer – I think it gives me more flexibility (it’s way easier to make changes – try making a clay figure 25% taller – on the computer, it’s just one mouse drag away!).
Also, one of the most important things about building a model for computer animation, is planning ahead for how that model is going to work once you’re animating it! It’s one thing to have a cool-looking model, but it’s not cool at all if it’s impossible to animate because of the way it’s been built or rigged (I’ll get to “rigging next.)
Anyway, I like to keep things as simple and flexible as possible.
For you LW trivia fans, (WARNING: geektech zone ahead) here are the specs on the Battle Slug model:
Built in LightWave Modeler (7.0)
The body is subdivision surfaces (1,863)
The helmet’s basic shape was built with subdiv surfaces, but “frozen” (converted to polygons using Metaform) so Booleans could be done for the eye slits. Final poly count is polygons (8,928)
Character rigged with skelegons (21)
There are embedded morph targets for some of the weapons (Big Ol Hammer and Shield) and Worley’s Distance Link was used to automate the undulating “skirt” of the slug and the spine spears.
All the animation was done in LightWave Layout (7.0 – 7.5).
All the action takes place inside a huge sphere.
Not wanting to eat up the rest of eternity rendering, we used simple, cheap tricks to simulate caustics (those ripply underwater patterns of light & shadow), light beams and other costly fx. You can read a quick tip on how we did the caustics on the
TECH TV website. We’ll be adding more specific tips & tricks over time – so stay tuned. Better yet – email your questions to me at susan@wonderlens.com or to Joe at surferjoe@wonderlens.com and we’ll do our best to answer them!
Tip #1
The Meaning of Life…er…Animation
At the risk of going “too deep into the magic”…just what IS animation?
When we think of what it means to “animate”, we often think of movement. But the real meaning of animation lies in its Latin origins. (oh jeez – not a Latin lesson)
The root of ANIMATE is “ANIMA”, which is not Latin for “big-eyed schoolgirls from Japan”.
Anima means “life”, “soul”, “breath”.
To animate is to breath life and soul into a character – pretty cool, eh?
It’s also a swell little reminder.
Animating isn’t just about making stuff move around. It’s about making stuff come to LIFE. And sometimes that means knowing when NOT to move at all.
Think of the brilliant held frames in almost any Aardman stop motion piece and you get the idea.
Tip #2
Saltwater Tutorial
Ok – I admit it. The description given on Tech TV’s site about the underwater caustics effect is a somewhat condensed explanation. Here’s the full scoop.
To get a “cheap” (fast renders) version of caustics – (the cool patterns of light & shadow you see as a result of light passing through water or a shower door) we began with a very low-tech solution: salt.
Ingredients:
1. Several sheets of frosted or “non creep” acetate (available at most art supply stores – avoid the regular shiny stuff, as ink will tend to bead up rather than flow evenly)
2. Black Ink or Black Cel Vinyl
3. Water
4. Salt
5. Expendable glass or plastic cup or bowl
6. An inexpensive paintbrush (cheap foam brush works fine)
7. Newspapers (optional)
8. Blowdryer (optional)
9. 1 lb bag of chocolate chips (just kidding – but honestly, never a bad idea)
Lay each sheet of acetate, frosted side up, on a surface you don’t mind getting messed up by black ink. I suggest newspapers…or use a friend’s home, heheh. Put about a Tablespoon of the black ink – or twice that amount of Cel Vinyl in your cup or bowl. Dilute with 2 or 3 Tablespoons of water – this is SO not scientific, so don’t bother to measure. I mean, really.
Dip your brush into the diluted ink and apply it as a wash, covering the whole piece of acetate. In this case, neatness does NOT count. Messy looks better.
While the ink is still wet, let a few drops of clear water drop onto the sheet. This will push the ink around and begin to make cool patterns. You can also use your blowdryer to gently push the ink around.
When ink is PARTIALLY dry – lightly scatter plain table salt over the sheet.
You’ll almost instantly see how the remaining water on the sheet will get sucked over to the salt, creating more interesting patterns. Hit the sheet with the blowdryer again to speed up drying – it’s best if the water dries before the salt becomes completely dissolved. Once the sheet is dry, brush off remaining salt. You’ll notice that there are really nice grainy textures – dark rings where ink pooled around the salt.
Scan the COMPLETELY DRY sheet.
Dude – we are NOT responsible if you put wet ink on your scanner.
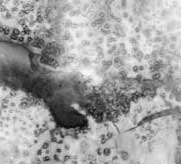
here’s a small detail from one of our scanned sheets
You can use just one sheet, but for added fun, do several and generate a sequence of frames, crossfading between the different sheets. (you can do this in LightWave or a compositing program like Digital Fusion. Just make sure you create a looping sequence – easily done by just repeating the sequence, in reverse order, also called “ping-ponging”)
Now go into your animation program (I’m using LightWave, but this general idea should work for any other platform) and load in the looping sequence you just generated. (Again, you can also use just a single frame – your original scan)
Map the sequence onto a flat, but subdivided piece of geometry. Make the surface about 70% luminous, 30% diffuse.
Position the geometry so it faces flat to CAMERA and fills screen completely.
Now you can start experimenting with procedurals. (these are random-ish patterns generated on-the-fly, based on fractal-type algorithms…just FYI) The purpose of this is to create more levels of texture & movement. I used “underwater” (no big surprise”) with a smidge of fractal noise.
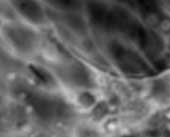
here’s a small detail with procedurals added
You can apply these procedurals to your original piece of geometry, or onto another layer of geometry, which you can partially dissolve out or make partially transparent via a transparency map (which also can be animated, for yet more fun!)
Renders will be a little faster if you throw everything onto one layer of geometry and forego the transparencies, but I went with the multi-layer mode, which does gives you a little more flexibility. Render times were so fast, it hardly seemed to matter.
You can also apply some procedural displacement to the geometry – I advise you start small – a subtle undulation on a small scale is a good place to start. Of course, you can also apply multiple layers of displacement and, if you’re using more than one layer of geometry, you can place different displacements on your different object layers. At this point, you’ll want to scroll around to see some of the extremes of your displacement and make sure your geometry still fills frame at every frame.
Lighting depends on what kind of scene you’ll be using this caustics sequence for. For our purposes, I kept the lighting fairly even, with slightly more light along one edge. Our sequence was made to be used as a Projection Image on lights covering fairly large areas of landscape. If you know you need certain areas of your scene to be in shadow, or one area needs to be much brighter than the rest of the scene, you can light for that now.
Now it’s time for a test render. I suggest a low res render of just a handful of frames to start, to make sure you’re in the ballpark. When you’re sure you like the overall look, the speed of the procedurals and the lighting, you’re ready for your full res render. Deciding how large to render the frames depends, again, on how you’re going to use them. It’s a trade-off between wanting the best possible look and the least amount of overhead. You want the images large enough that the images will hold up, even when projected over a large area. But you don’t want the images so large, your scene becomes bogged down. We rendered the sequence at several different sizes. We used the lower res sequence for tests, and swapped the big images in for final renders.
In the same way we made the earlier crossfade sequence loop, we’ll need to make this sequence loop (or generate enough frames that we never need to repeat).
It’s important to make your sequence long enough that the looping is not obvious (or your scenes short enough that looping is never needed)
Once you have your finished image sequence, you can apply it to your scene.
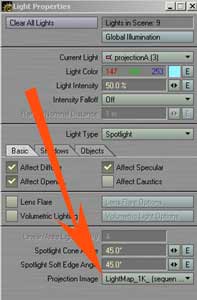
We applied the sequence as a Projection Image to several large spotlights. (the setting is at the bottom of the Light Properties Panel)
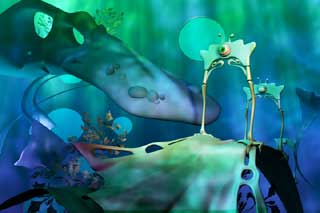
Here’s our environment with the sequence projected through spotlights
Note the beams of light filtering down from top of frame. These are just single polygons with a transparency map and an animated dissolve envelope. The polys are also animated slightly to sway and overlap, for added texture and movement.
It’s a nice, complex environment but has only nine lights in the scene and renders super fast! And any characters or other objects that pass through this environment will also pass through the projected image and will benefit from the same lighting effects.
We’ll be adding more animation tips & stories as we go.
Also look for anecdotes (and horror stories) from our previous lives in film & tv.
We’ll also be sending you stories and photos from our current life,
from the front line of do-it-yourself filmmaking!